ALM – Run EasyRepro in Azure DevOps Pipeline
In my previews articles, you learned about Basic ALM, how to use the Solution Checker in an Azure DevOps pipeline as well as how to use the results of it. In this article you will learn another “Quality Gate” you could add to your ALM process. We look at how to run EasyRepro in Azure DevOps Pipeline.
EasyRepro
EasyRepro is a UI (User Interface) Test Framework for Dynamics 365 and all Model-Driven Apps in the Power Platform. It is developed by Microsoft and an OpenSource project which is accessible both on GitHub and as a NuGet package.
After this article, you will know how to run those tests inside of your Azure DevOps pipeline.
In the GitHub repository, you can find a lot of sample Tests. We will use one of those as a demo test. Our demo test will log in to our environment and create a test contact. The following sequence shows how this will look like when you run it on your device. The same will happen on the build server in Azure, without you seeing it.

Creating the Pipeline
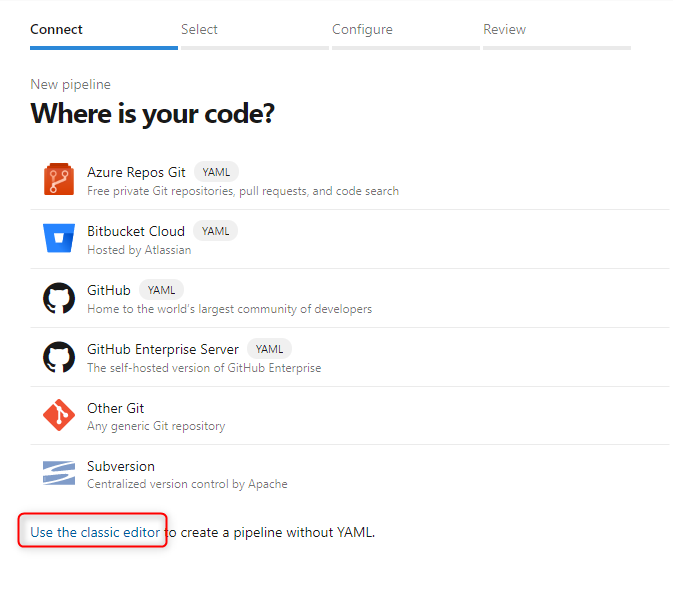
First of all, we have to create an empty pipeline. To do this you open “Pipelines” in the menu on the left and then press the “new pipeline” button. If you already have another pipeline it will be in the upper right corner otherwise it will be in the middle of the screen. In the next screen, you have to choose “use the classic editor”.
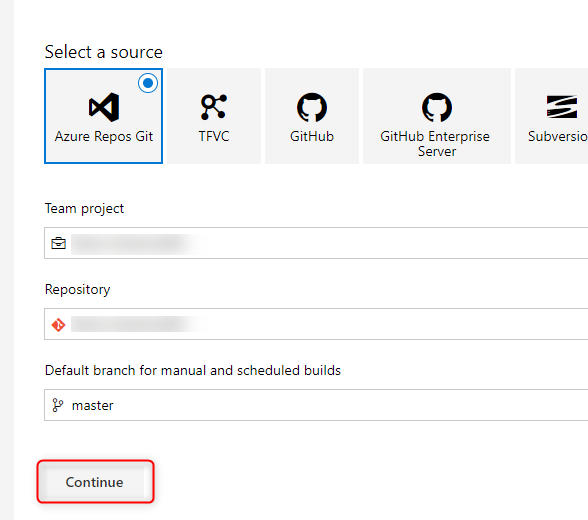
On the second screen, you can leave the defaults like they are.
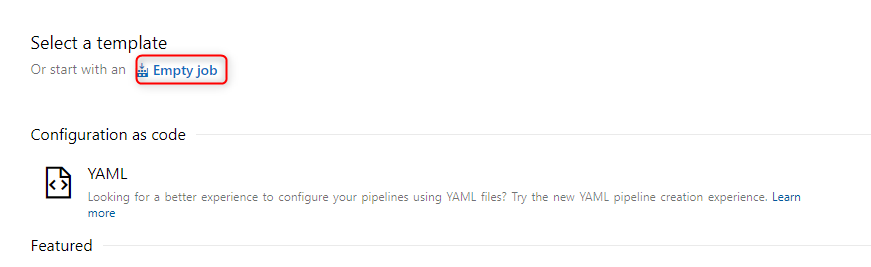
On the third and last screen, you choose “empty Job” at the top of the page.
Adding Steps
We have to add 5 Steps to our fresh pipeline.
First, we will add 2 NuGet Steps.
- Installing the NuGet Tools
- executing NuGet restore
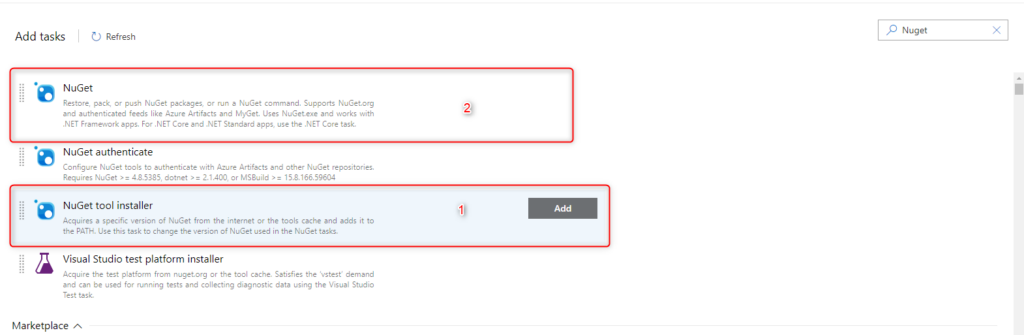
To do so you press the “+” and search for “NuGet” in the appearing flyout. After that, you first add the step “NuGet tool installer” and secondly the step “NuGet”.
Thereafter we have to add 3 Visual Studio steps. This time you search for “visual” and add the following steps in this order:
- Visual Studio build
- Visual Studio test platform installer
- Visual Studio Test

Now you should have the following steps in the shown order.
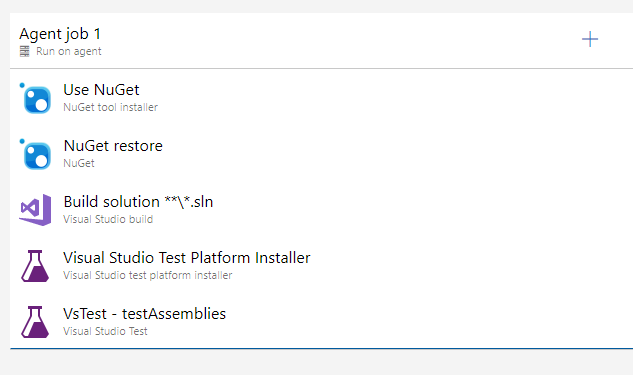
Configure Steps
Out of our 5 Steps we only have to configure 2.
Config Build Step
In the build step, we have to define which solution we would like to build, which version and configuration to use.
We only want to build the EasyRepro Solution. In the demo case, we have to add the following in the “Source” field of the step because we do have a separate Solution for UI tests in the “EasyRepro” folder.
**\EasyRepro\*.sln
In the field “Visual Studio Version” you choose “Visual Studio 2017” out of the dropdown.
Finally, you should write “release” in the “Configuration” field.
Overall the configuration of the Build step should look like this.

Config Test step
The second step we have to configure is the “Visual Studio Test” step.
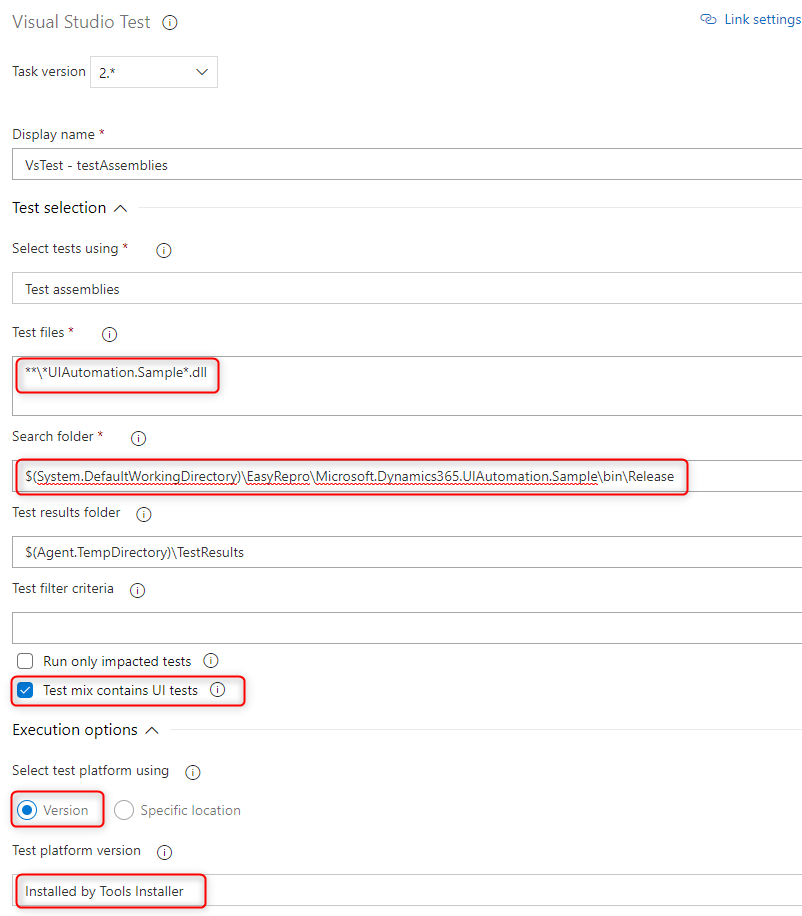
Here we have to specify the test files, the search folder, the containment of UI tests and the test platform to use.
In the field “Test files” you should add a pattern that specifies your test files. In the demo case, the following will suit our needs since we use the EasyRepro sample projects.
**\*UIAutomation.Sample*.dll
The “Search folder” should specify where the test runner can find the tests after they were built. This value also depends on your project structure, but the beginning should always we “$(System.DefaultWorkingDirectory)”. For our demo, I will add the following value.
$(System.DefaultWorkingDirectory)\EasyRepro\Microsoft.Dynamics365.UIAutomation.Sample\bin\Release
You have to check the checkBox besides “Test mix contains UI tests” as well as selecting the “Version” radio button under “Select test platform using”.
The last configuration should be to select “Installed by Tool installer” from the dropbox for the “Test platform version”.
All the configuration together should look like the following screenshot (with your alterations).
Running the tests
After you have saved & queued the pipeline it should run and execute your UI tests.
In our demo, we just run one test (the one you have seen at the beginning of the article).
In the console output of your pipeline run, you should get a message that 100% of the tests where passed.
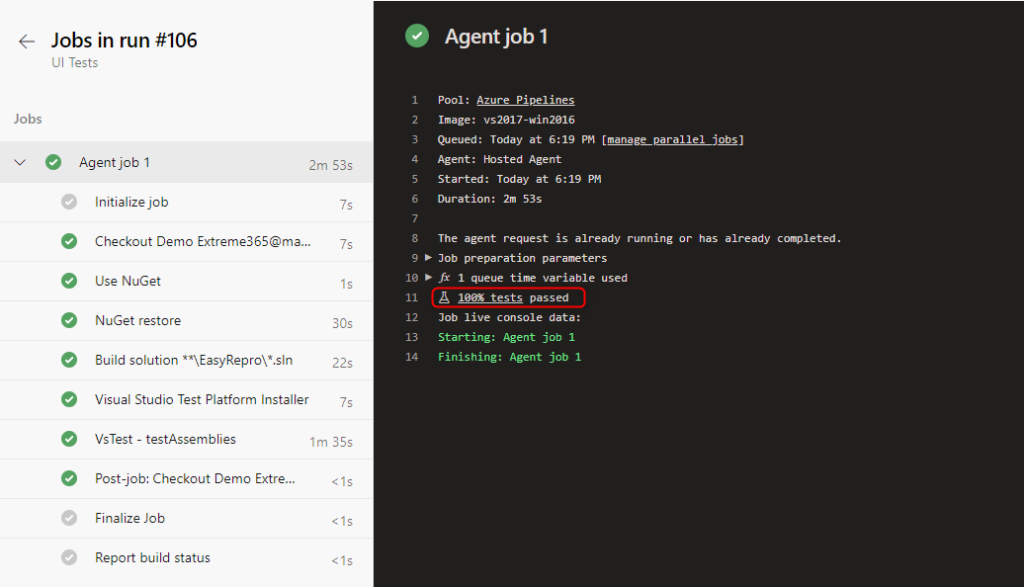
When you click on the message (marked with a red rectangle) you will be redirected to the test result page.
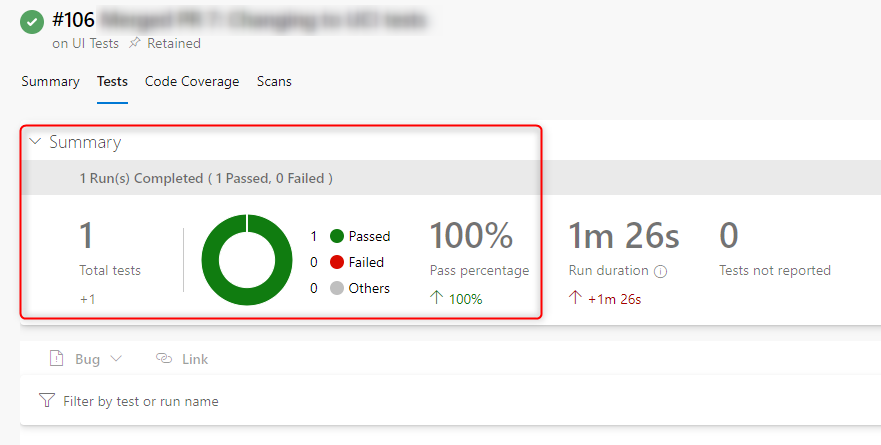
Here you can analyze your test run. You see the passing rate, potential errors, run duration and a lot more.
Creating a task group
If you would like to reuse those steps and maybe run them in several pipelines, you could create a task group that contains those 5 steps.
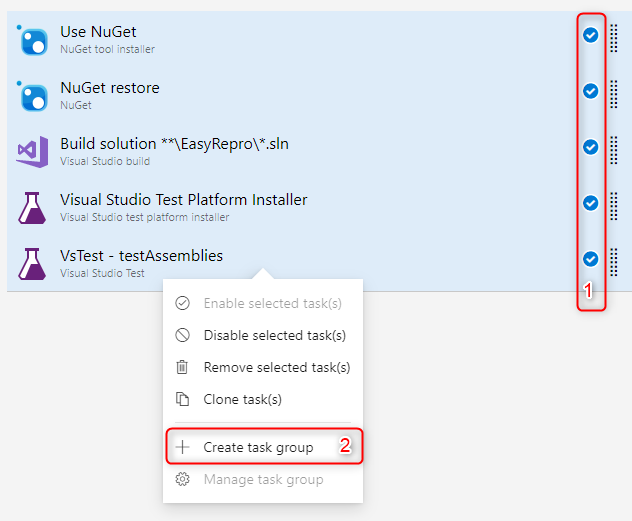
To do this you have to mark all 5 steps, klick with the right mouse button and select “Create task group”.
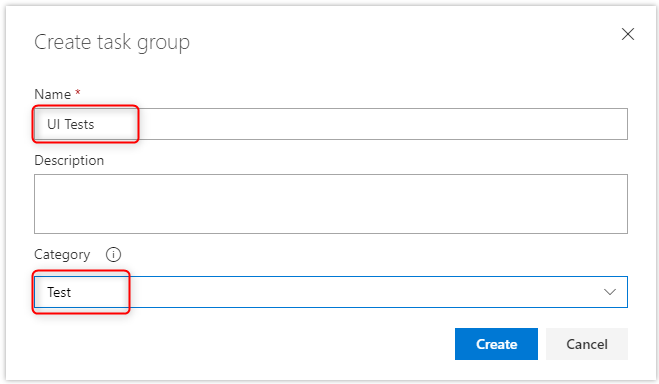
In the upcoming popup, you have to choose a name for your task group. You also should choose the right “Category”. In this case, it should be “Test”.
After clicking on “create” the pipeline should look like this.

Adding the task group to a pipeline
If you would like to reuse the task group you just add a new step, select the test tab and choose your “UI Test” task group.

When you now change something in your task group it will be changed in every pipeline that uses your task group. Which reduces manual work and errors that could come with that.
Conclusion
We have, in a few steps, learned the possibility to run EasyRepro in Azure DevOps pipelines. This is another step towards a solution that has higher quality.
I hope you enjoyed this article. Please leave me a comment or contact me in another way if you have any questions or feedback.
You can also subscribe and get new blog posts emailed to you directly.
About The Author
Benedikt
Power Platform Consultant @ CRM Konsulterna
Hi Benedikt, thanks again for a great article. I just happen to be working on running EasyRepro tests from Azure Devops!
I was wondering, are you using the app.config or the EasyRepro.runsettings file for passing the parameters (username, password, url)?
Hi Jeffry,
you are very welcome. Great that you like my articles.
Since I used the Sample project as a demo it is using the app.config to get the configuration. This is, to be honest, very suboptimal and should not be done like this in a real-world scenario. You should store your password in a more secure way. Maybe in an Azure KeyVault.
Now that you asked about it: I wonder if it would be possible to execute the Tests with an “Application Registration”. Maybe that’s the next thing I will test.
I solved it by using the EasyRepro.runsettings file, both for local testing as for running in Azure Devops, so I’m not using the app.config at all for parameters. You can replace parameters in your .runsettings file with (secure) variables in Azure Devops.
Perfect! It sounds like a good solution.
Do you want to write a short article about it? I can then crosslink it.
Hello. So Chrome was is already installed?
I do assume you are talking about Chrome on the Azure agent.
This will be installed with the “Visual Studio Test Platform Installer” step.