PCF – Prevent saving the form when input is invalid
In today’s article, we will learn how it is possible to make it possible to prevent saving the form when input in your custom PCF control is invalid.
At the moment there is no out of the box possibility to do this. There is an idea from Ben Thompson regarding this issue in the idea forum.
Thanks to Andreas Ziegler who pointed it out and change one of my PCFs to make it work. Now all of my PCF Controls, which change data, are implementing this pattern.
Prepare the PCF Controle
To prepare the PCF we need an additional input field (two-options) and have to promote the valid status to this field on any change.
Update Manifest
In the Manifest we have to add the additional input, which should be bound to a twoOption field.
This can be achieved with the following line.
<property name="inputValid" display-name-key="PropertyInputValidField_Display_Key" description-key="PropertyInputValidField_Desc_Key" of-type="TwoOptions" usage="bound" required="false" />
In my example you would also have to add the keys to your string files. I will not go into this within this article. If you need help with this, feel free to contact me. I am happy to help.
Changes to TypeScript
The TypeScript file has to be updated as well.
Global variable
First of all, we have to add a global variable that will hold the current validation status.
private _inputValidReturnValue = false;
Handle “getOutputs”
The next step is to add the new field as an output in the “getOutputs” function.
public getOutputs(): IOutputs
{
return {
valueField: this._value,
inputValid : this._inputValidReturnValue
};
}
If you would like to only promote the value when the input is valid you could use the following code (thanks to Diana Birkelbach for the tip).
public getOutputs(): IOutputs
{
if(this._numberValidReturnValue){
return {
valueField: this._value,
numberValid : this._numberValidReturnValue
};
} else{
return {
numberValid : this._numberValidReturnValue
};
}
}
Handle input
Somewhere in your PCF you will handle a value change. In my case, I have added a listener to the input change event that will call a function called “inputOnChange”. In this function, we must handle the valid value as well. So we have to set “this._inputValidReturnValue” to true if the input is a valid value or to false if it is not. At the end, we have to call the “notifyOutputChanged” function.
See a simplified version of the “inputOnChange” function of my CheckPhoneNumberControl below.
public inputOnChange():void{
if(this._inputElement.value === "" || this._inputElement.value === null || this.isCorrectPhoneNumber(this._inputElement.value)){
var parsedPhoneNumber = (this._defaultCC !== "")? PhoneNumber(this._inputElement.value, this._defaultCC) : PhoneNumber(this._inputElement.value);
if(parsedPhoneNumber === undefined || !parsedPhoneNumber.isValid()){
this.handleValue(this._inputElement.value);
this._numberValidReturnValue = false;
}else {
this.handleValue(parsedPhoneNumber.getNumber(this._outputFormat));
this._numberValidReturnValue = true;
}
}
else{
this._value = this._inputElement.value;
this._numberValidReturnValue = false;
}
this._notifyOutputChanged();
}
Unfortunately, I still have one problem with it now. Since the “inputValid” output needs to be set every time a change is made, we must call the “_notifyOutputChanged” function in either way. Calling the function will, unfortunately, also promote any change to the real input. This leads to updating the underlying field even when the input is not valid. The desired behavior would be to only promote the “inputValid” value but not the actual input value. I haven’t found an appropriate solution to it, yet. So, if you have one feel free to reach out to me.
Update: Diana Birkelbach reached out to me via LinkedIn. She mentioned one of her blog posts that is explaining how to fix the mentioned problem. Thanks for that. I have updated the "Handle "getOutputs"" section of this post accordingly.
Configure CDS MDA
If you have deployed your PCF to your CDS environment we have to configure everything in CDS to be able to use the functionality.
Add additional field
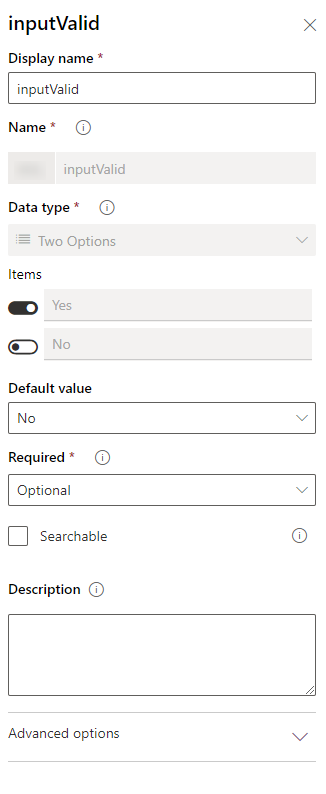
We must add an additional field on the entity you would like to use your PCF with.
In our example, we will use the CheckPhoneNumberControl in the cell phone field of the contact entity. Therefore, we will add an additional field to the contact entity which is called “inputValid”. The type should be “Two Options”.
Configure form
On the form we must configure several things.
Add fields
First, we must add our two fields to the form.
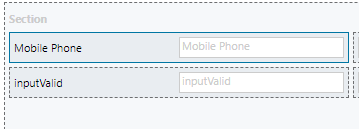
Since we still cannot add PCF controls to fields in the new make portal i have added the fields as well in the legacy editor.
In a production use you could/should hide the “inputValid” field, since it only should/will be used by the application and never by the end-user.
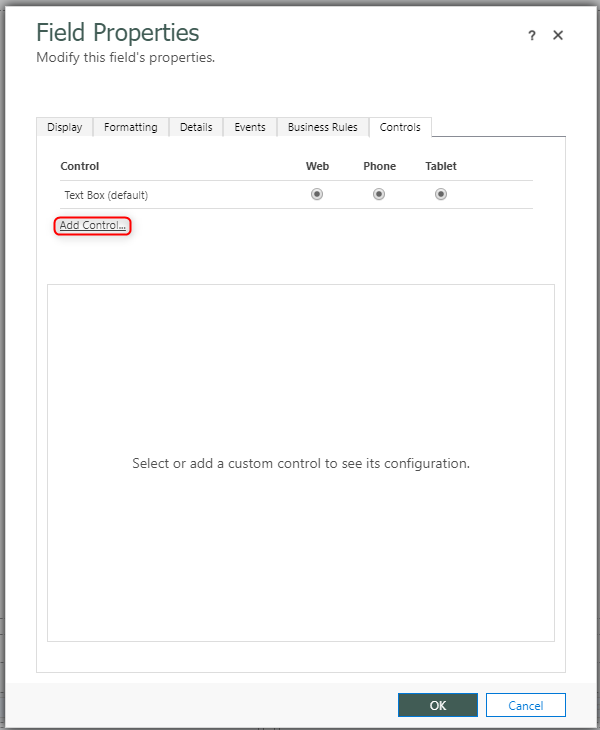
Add PCF as control
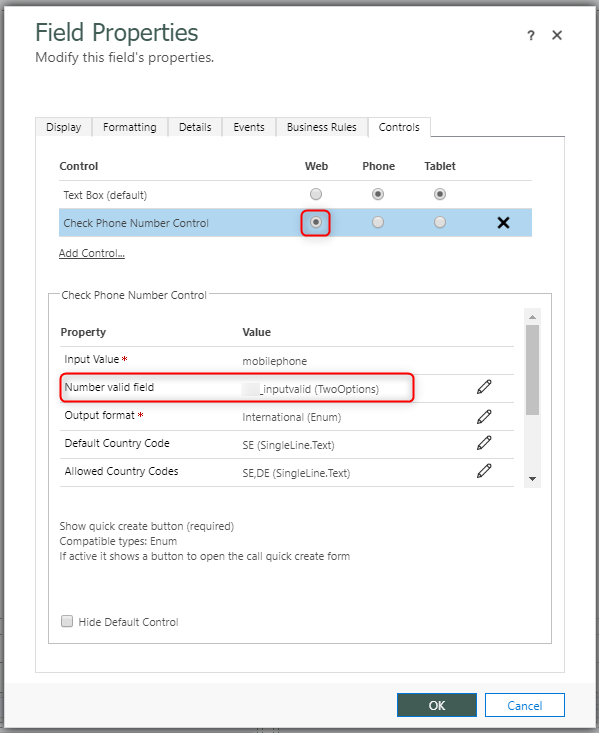
When the fields are added to the form, we can add our PCF control to the “Mobile Phone” field. If you double click on the field, it will open the “Field Properties” pop-up. In the pop-up, you navigate to the “Controls” tab. To add your PCF as the control you click on the “Add Control…” link, as shown in the following screenshot.
In the new pop-up, you can choose your PCF from the list of available controls and press “Add”.

After that, you choose the small pen symbol beside your “Input Valid field” to bind the additional “inputValid” field.
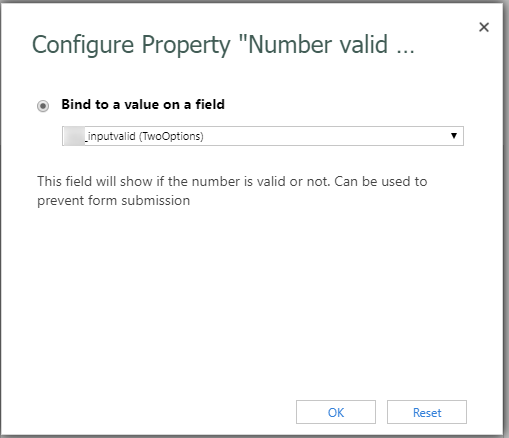
The Field Properties should now look something like this.
After saving the form and publishing it the form configuration is completed.
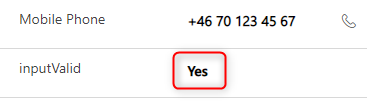
Result
The result will be something like the following.

Prevent saving the form
There are now two different approaches to how you could prevent the form to save when the field value is not valid.
- Via a Business Rule
- Via JavaScript
Business Rule
To prevent the form of saving via a Business Rule (BR) we have to create a rather simple BR.
It will only have one condition and one action

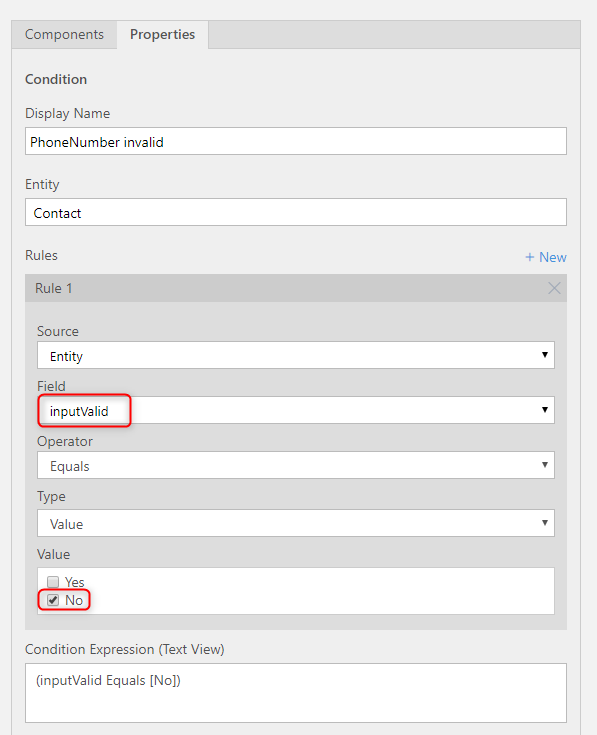
Condition
The Condition should check whether our “inputValid” field is false.
Action
The action should be of type “Show Error Message” and add an error message to either our mobile phone or inputValid field.

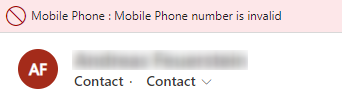
Result
When trying to save the form the BR will show an error on the input, on the top of the page and prevent the form of saving.
Pros/Cons
Positive with this solution is, that you don’t need a developer to implement the save prevention.
Negative is that the message is “hard coded” and there is no way of translating it if you use different languages in your solution.
JavaScript
The second approach is preventing the form to save using a JavaScript snippet.
Code
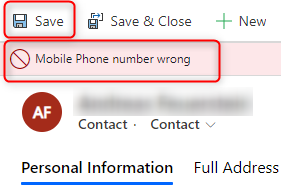
The code should check our “inputValid” field. If it is false it should add a notification and prevent the form from saving.
function CheckIfMobilePhoneIsValid(executionContext) {
const formContext = executionContext.getFormContext();
const notificationId = "257A3A6D-760F-4179-A159-50511DD78601";
const validField = formContext.getAttribute("aca_inputvalid");
const validFieldValue = validField.getValue();
const numberInValid = validFieldValue === false;
if (numberInValid) {
formContext.ui.setFormNotification("Mobile Phone number wrong", "ERROR", notificationId);
executionContext.getEventArgs().preventDefault();
} else {
formContext.ui.clearFormNotification(notificationId);
}
}
Note: getEventArgs().preventDefault(); is only available on the “onSaveContext”.
Since every notification requires a unique id I have hard coded one in this snippet.
This code must be added to some JS web resource in your CDS.
Add function to onSave event
After creating the web resource, we can add the function to an event handler.
To do this we have to open the form properties (unfortunately again in the legacy editor)

In the now opened pop-up we have to add our web resource as an library first. To do this we use the “Add” button in the “Form libraries” section.

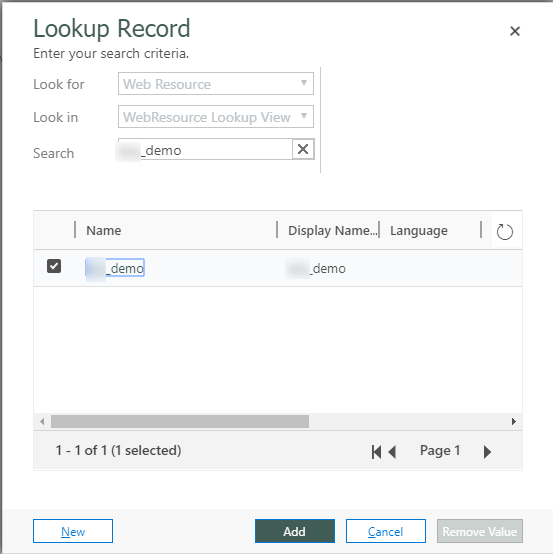
In the new pop-up we will search for our web resource and add it.
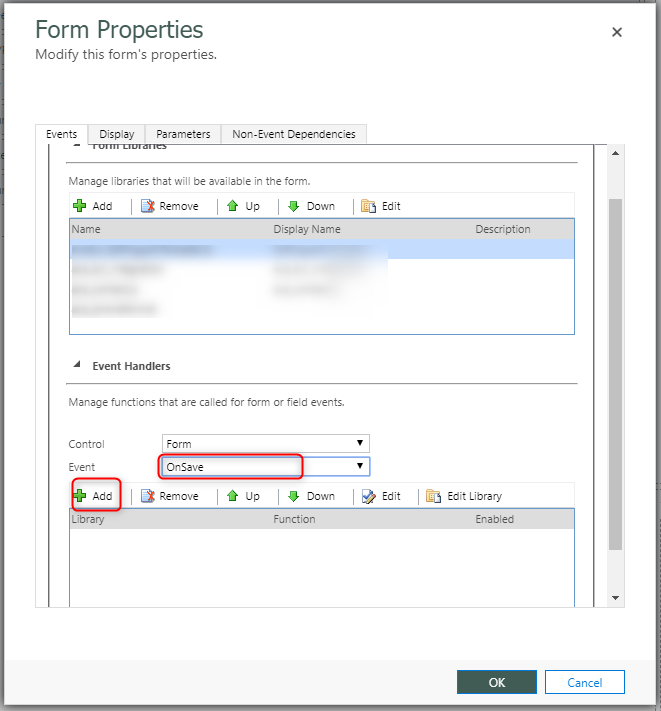
The next step is to add an event handler on the onSave event of the form. To do so we will change the “Event” dropdown in the second section, “Event Handlers”, of the form properties to “OnSave” and use the “Add” button.
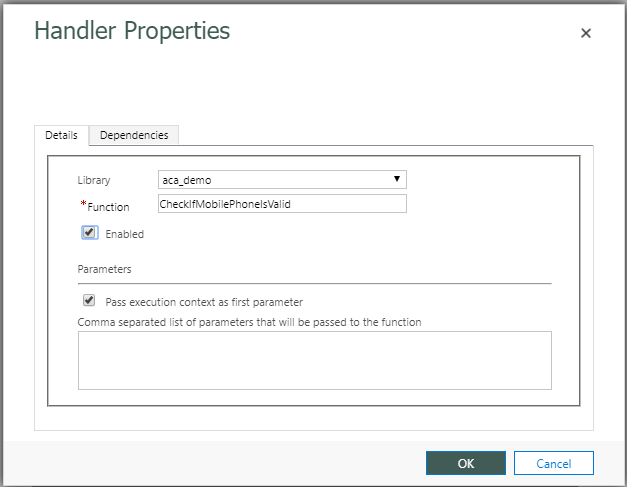
We have to choose our library, write in the name of our function (for the demo it is “CheckIfMobilePhoneIsValid”) and check the checkBox besides “Pass execution context as first parameter”.
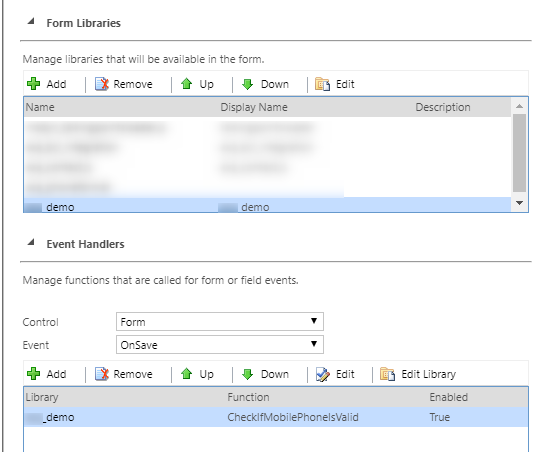
Now our form properties should look like this.
Result
When trying to save the form the script will show an error on the top of the page and prevent the form of saving.
Pros/Cons
A good thing with this approach is, that you could translate your message based on the users language.
To implement this you need a developer. Another con is that you might have compatibility problems in the future, when MS changes something on the API.
Conclusion
In this use case, we can clearly see that the PowerApps Component Framework is not 100% mature yet. There are some things that still need improvement.
But there is a workaround for most of the cases. At least for my scenarios, I was, until now, always able to find one.
I hope you enjoyed this article. Please leave me a comment or contact me in another way if you have any questions or feedback.
You can also subscribe and get new blog posts emailed to you directly.
About The Author
Benedikt
Power Platform Consultant @ CRM Konsulterna
How to use executionContext.getEventArgs().preventDefault()
in typescript code
Hej Jimmy,
{
you would need to use the input context as a type of “SaveEventContext”.
This could be done by having the function input as this type
export async function onSave(eventContext: Xrm.Events.SaveEventContext): Promise
eventContext.getEventArgs().preventDefault();
}
or by casting the input context to this type when using it
{
export async function onSave(eventContext: Xrm.Events.EventContext): Promise
(eventContext as Xrm.Events.SaveEventContext).getEventArgs().preventDefault();
}
Hope this helps