Quality Gates for Check-Ins
In this blog post I will describe how it is possible to add Quality Gates for Check-Ins in your git repository.
The solution contains several Quality Gates:
- It will not be possible to check-in directly to the “master” branch. A Pull-Request will always be needed.
- At least one other person/developer has to accept the Pull-Request before it will be possible to merge it.
- All Comments on the Pull-Request needs to be resolved.
- A Pipeline, which runs all the tests, will be triggered automatically. Only when the run is successful a merge is possible.
Configure the Pipeline
The first step is to configure the pipeline that will be triggered automatically.
In this demo scenario, we will create a pipeline that will run all tests in a C# application (for CDS Plugins for example). You could extend this pipeline for any other tests as well (for example TypeScript tests).
I would not recommend running UI tests (for example with EasyRepro), those run quite long, and the pipeline could be triggered a lot.
Creating Pipeline
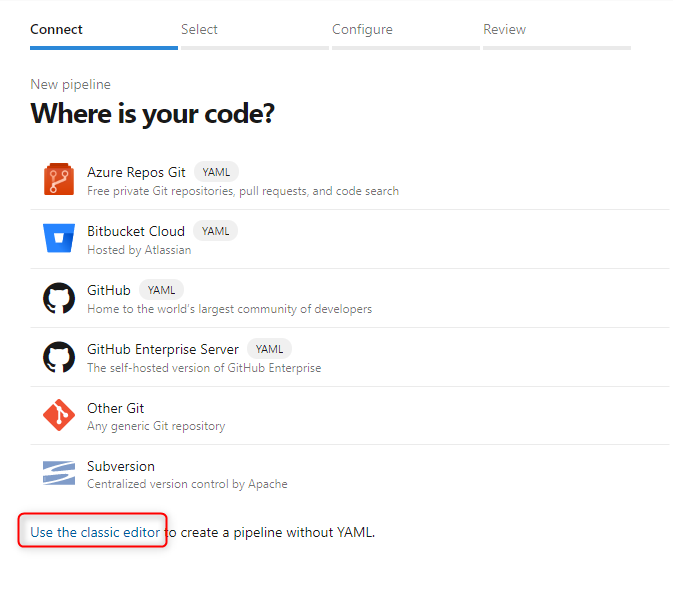
First of all, we have to create an empty pipeline. To do this you open “Pipelines” in the menu on the left and then press the “new pipeline” button. If you already have another pipeline it will be in the upper right corner otherwise it will be in the middle of the screen. In the next screen, you have to choose “use the classic editor”.
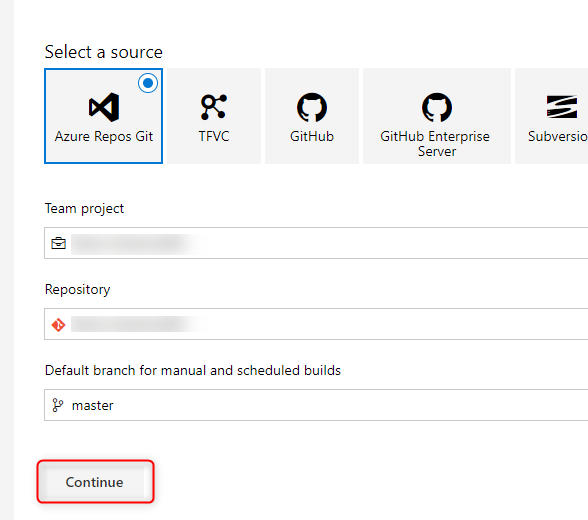
On the second screen, you can leave the defaults like they are.
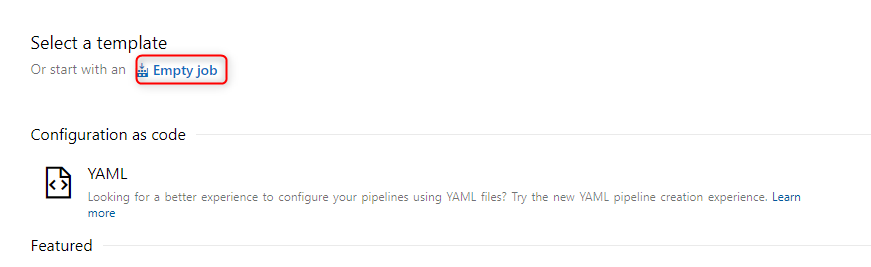
On the third and last screen, you choose “empty Job” at the top of the page.
Add Steps
For this demo we need 5 Steps in our newly created pipeline.
Use NuGet
This Step will install NuGet on the Build Agent. This step can be used with the standard configuration.

NuGet restore
This Step will restore all the NuGet packages. This step can be used with the standard configuration.

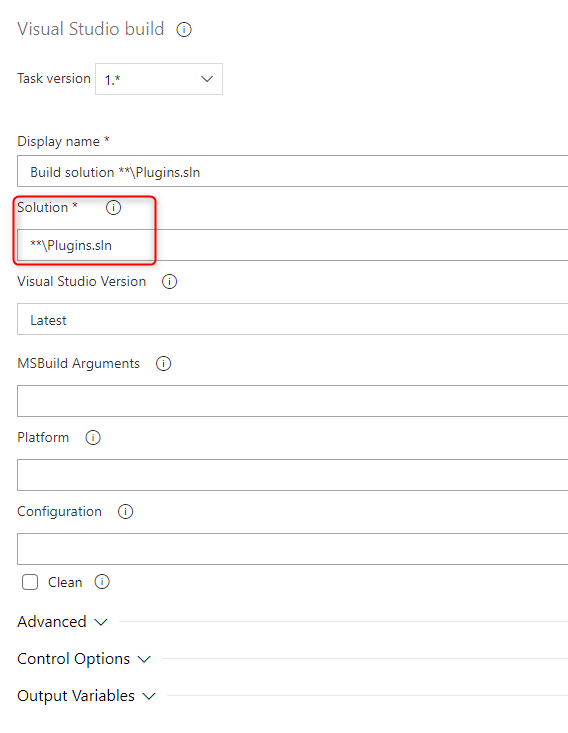
Build Solution
This Step will build the Solution. For our example, we will only build the Plugins solution. To achieve this, we will change “Solution” in the configuration to
**\Plugin.sln

VS Test Platform installer
This Step installs all the Test platform on the Build Agent. This step can be used with the standard configuration.

VSTest
This step will execute all the Tests. This step can be used with the standard configuration.

Add Policy to Branch
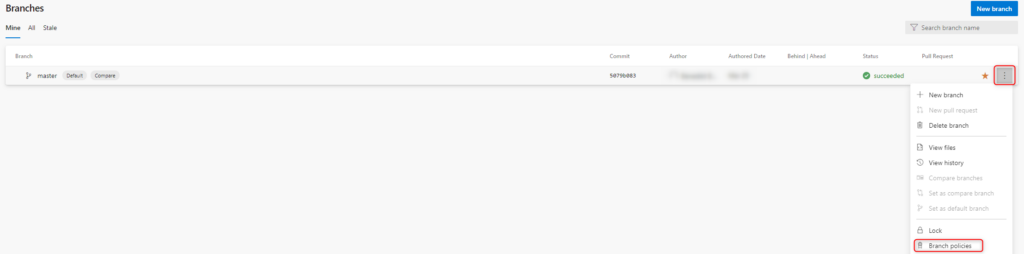
Now we have to add a policy to our “master” branch. To do this we navigate to the Branches and choose “Branch policies” from the dot menu of the master branch.

Here we will check the box “Require a minimum number of reviewers”, change the minimum number to the number you would like to have (for the demo we take one), and make sure to not check “allow requestors to approve their own changes”.
The combination of the last configuration checked and one as the number of reviewers would make it possible for one individual to merge the pull-request.
The second thing we check is “Check for comment resolution”. This will require all comments to be resolved (if “Required” is chosen).
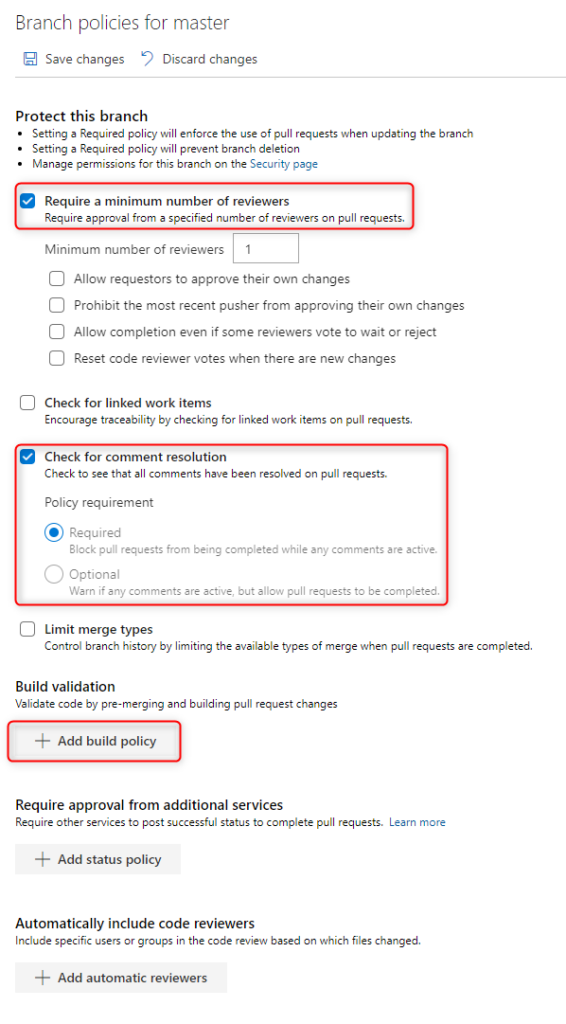
The last step in configuring the policy is to add a build validation by clicking the button “Add build policy” (see screenshot above). This will open a fly out on the right side.
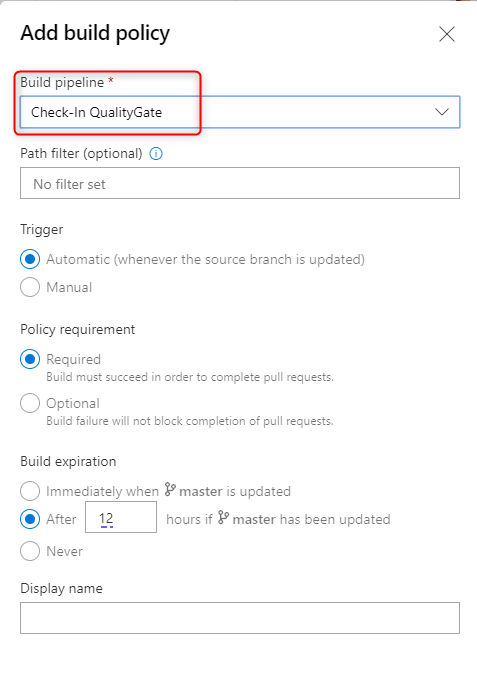
In the “Build pipeline” we choose the pipeline we created earlier. All the other configuration can be left as they are.
The complete policy will look like this
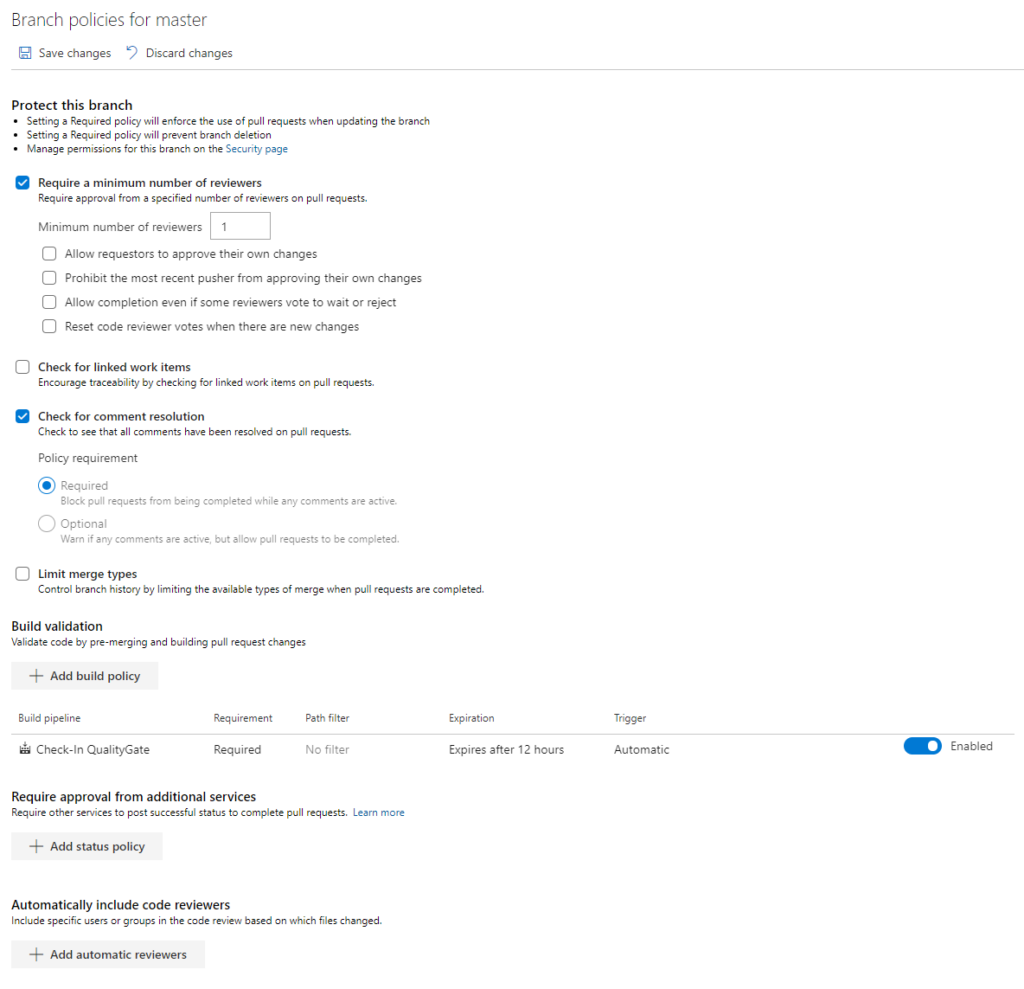
After saving the policy, by using the “Save changes” button on the top, it is active immediately.
Result
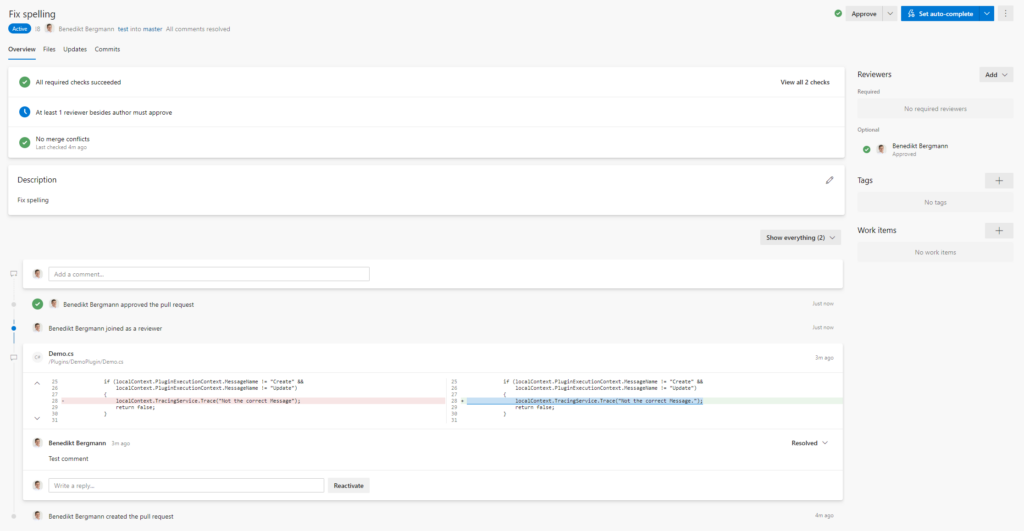
From now on you have to create a Pull-Request (PR), the pipeline will be triggered per check-In and the PR can only be merged when all the requirements are met.
The following Screenshot shows a demo pull-request. You can see that all checks are succeeded.
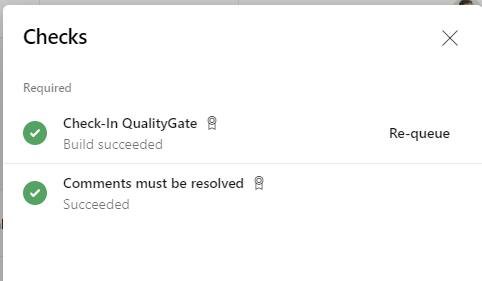
The second screenshots show the checks in detail. Those are that all comments are resolved, and the pipeline succeeded.
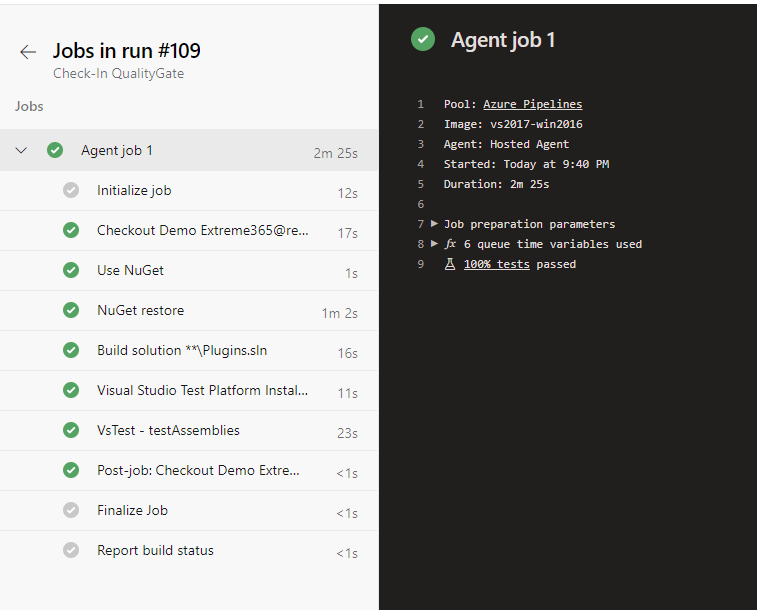
The following screenshot shows the successful run of the pipeline we configured, which was triggered directly when I checked-in my changes.
The only thing that prevents me from merging the Pull-Request is the need to have a second reviewer.
Conclusion
It is a rather simple approach to secure a certain quality within your main branch. The configuration will not take long, but the effect is big.
I hope this post will help you.
Like always: Feel free to contact me with any feedback or if you have any further questions.
Video
I also created a video explaining the topic.
You can also subscribe and get new blog posts emailed to you directly.
About The Author
Benedikt
Power Platform Consultant @ CRM Konsulterna