Add Sparkle XRM to a Webresources project
One of the presentations I give regularly is about setting up a Typescript project for Dataverse. It basically is a presentation/live demo of one of my other blog posts. One of the questions I get often during the presentation is how to set up Sparkle XRM to automate the deployment process of Webresources. So I thought it might be good to write a blog post about how to add Sparkle XRM to a Webresources project.
You can find the code of this post on my GitHub repository.
Situation
In some of my previous blog posts we have created a basic TypeScript project and added some more complexity (adding SASS and adding React and tests).
To this project, we would like to add Sparkle XRM, or better to say the spkl task runner, to be able to automate the deployment process of our Webresources.
Problem
Our setup so far was done in Visual Studio Code and has only used npm to install packages. The spkl task runner on the other hand is provided via a NuGet package.
This means we have to create a “normal” Visual Studio solution to be able to add Sparkle XRM to our webresources project.
Implementation
Let’s dive into the implementation
Create project
First of all we have to create a new project in Visual studio. We will choose “Console App (.Net Framework)” for it.
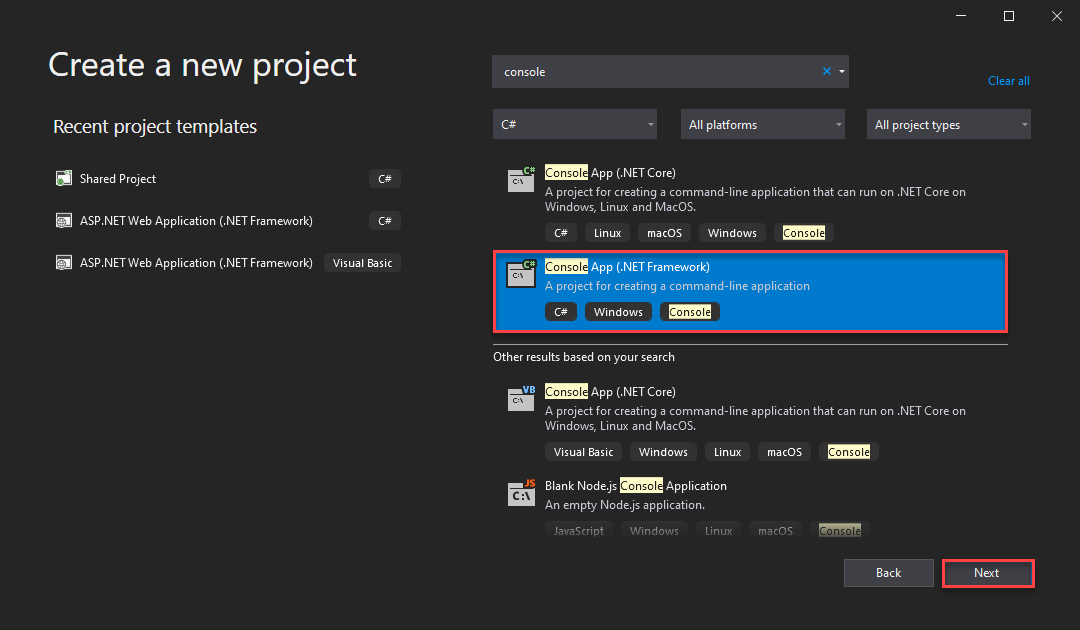
On the next page we write the Project name, in our case “HelperTools”, as well as the location. The location is within our TypeScript setup root folder.
I took “HelperTools” as the solution name to be able to add other stuff in the future. For example, we could add the configuration for XrmDefinitelyTyped.

You could select “Place solution and project in the same directory” to make your folder structure easier.
Install spkl
Next step is to add the spkl NuGet package. To do so we right click on our project in the Solution Explorer, choose “Manage NuGet packes”.

In the upcoming window we go to “browse”, search for “spkl” and install the package.

Configure spkl
Now we have to configure spkl. This is done in the spkl.json which appeared when we installed the spkl NuGet package.
We have to delete everything which isn’t within the “webresource” array. As the “root” we write “../../Webresources/” to select the Webresources folder as the root for all our webresources to deploy.
I tend to have one folder called “webresources” which contains all the webresources. Even the JS output of our TypeScript is stored there. Please see my blog post about the basic setup for the folder structure and more details.
As the solution I use “SpklDemo”, but you can write which ever solution you would like to have the webresources added by spkl.
The solution has to be present in the target environment. If it is not the webresource will be deployed but not added to any solution.
Last step is to fill the “files” array with all the webresources we would like to deploy.
For this article I only add our “demo.js” file. The object has to contain at least:
uniquename
This is the name the file will get inside of Dataverse. I usually start with the customers prefix and “recreate” the folder structure we have in the webresource folder. This will make it easier to find files later.
file
Here we need the search path to the file we would like to deploy. Be aware that this is in relation to our root path.
description
The description which will be shown in Dataverse.
In addition to that you could configure a “displayname” as well.
So here is a demo config file after deleting all the comments and everything which isn’t webresources
{
    "webresources": [
      {

          "profile": "default,debug",

          "root": "../../Webresources/",

          "solution": "SpklDemo",

          "files": [
          {
            "uniquename": "bebe_/js/demo.js",
            "file": "js\\demo.js",
            "description": ""
          }
        ]
      }
    ]
}
Run spkl
Now that we have installed and configured spkl we can run it. In your project, there is a folder called “spkl” inside of that folder you will find several .bat-files. One of which is “deploy-webresources.bat”. If you run this the spkl task runner will be started.
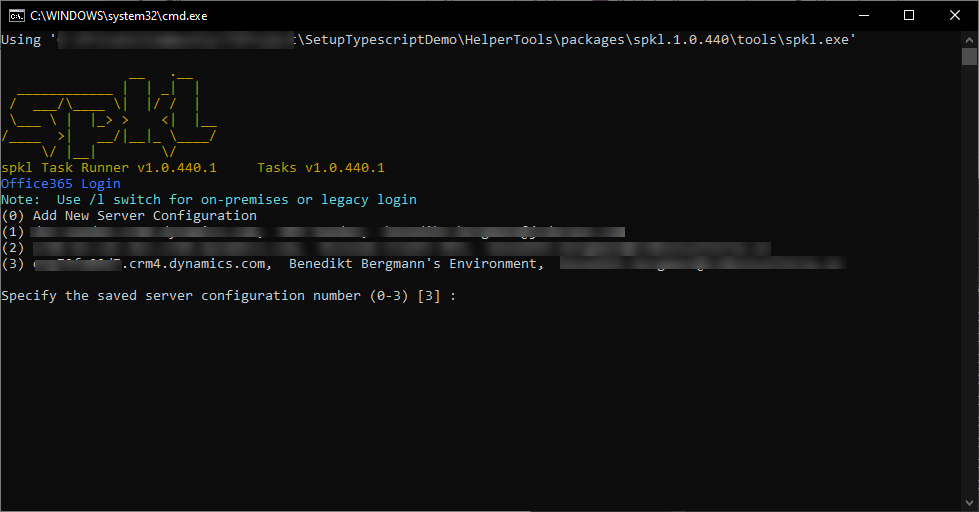
Creating connection
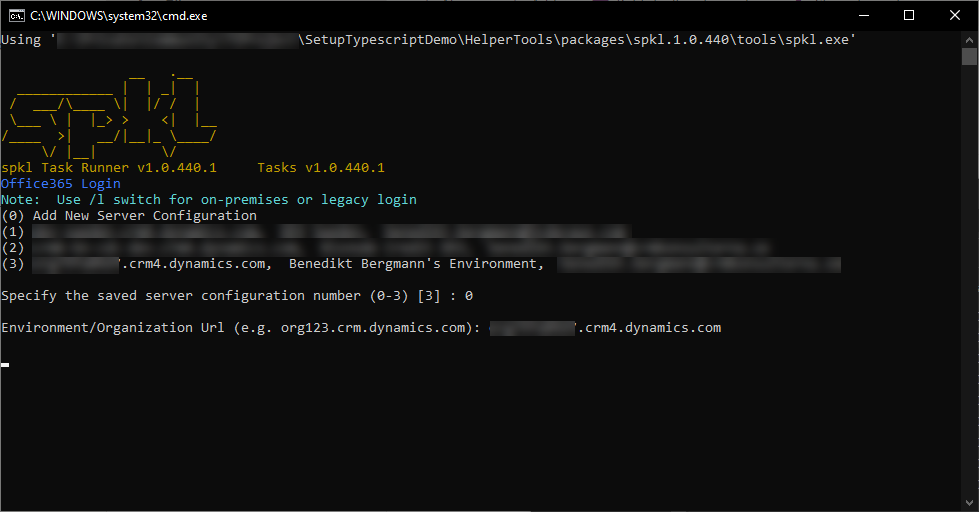
When you run the script the first time (or if you need to connect to a new environment) you have to create a new connection. Choose “0” and type the url to your environment (without https://).
A pop up will appear where you have to login to your environment.
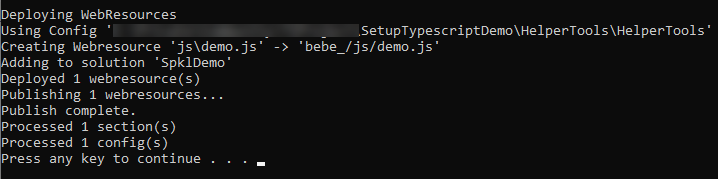
Deploy
After you select the right connection (one of the numbers displayed in the lost) it will deploy your webresources according to your configuration.
If the CMD window automatically closes itself you have an error and the run wasn’t successful. In the “spkl” folded you will have a file called “Log1.txt” which should contain more information about the error. Most likely it’s some misconfiguration in your spkl.json. Maybe some file which isn’t present any longer.
Conclusion
As you could see it isn’t very complex to add sparkle XRM to a webrsources project. With this configuration, you could automate the deployment within your Pipeline. I have written a blog post about this.
I hope this post helped you. Please let me know if you have any further questions.
You can also subscribe and get new blog posts emailed to you directly.
About The Author
Benedikt
Power Platform Consultant @ CRM Konsulterna
I followed your instructions, but the spkl folder is not being created. I am using VS 2022
Do you mean the one that should get created when installing the NuGet package and contains the bat files?
Yes. I have tried with all kinds of different solution types, but the spkl folder with bat files is not being created. I am using Visual Studio 2022 spkl version 1.0.640
This shouldn’t be the case. As soon as you install the NuGet the folder should be created. Have you raised an issue in the GitHub repository of Spkl?